
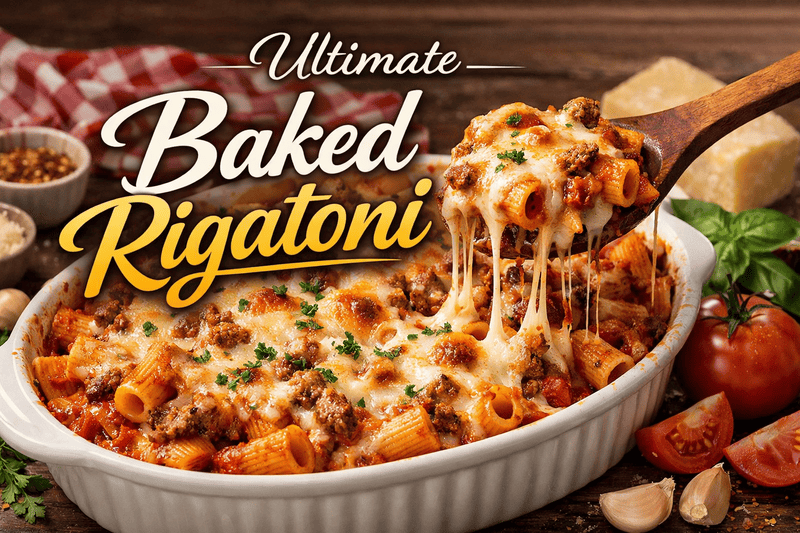
As someone who has cooked pasta for a lot of busy night dinners, I find this Cheesy and comforting Baked Rigatoni recipe brings real love to the table because it turns simple food into a perfect meal for the whole family, using ground beef, rich marinara sauce, soft ricotta, and melted mozzarella cheese that tastes good even as leftovers the next day; I often enjoy making it on a relaxed Sunday, when the kitchen smells of garlic and warm bread, and I’ll sometimes add a small salad with mixed greens, because this easy dish is my favorite way to share hearty recipes that feel homemade, are proudly served hot, and always remind me why I fell in love with cooking beef pasta in the first place.
Why This Oven-Baked Rigatoni Is a Family Favorite
There is something special about a Cheesy, Baked, Rigatoni dish that feels like a warm hug after a long day, and in my home, this easy to make recipe has become a true family favorite because it is perfect for a cozy Sunday meal or even a busy week night. I have tried many pasta recipes, but this one always turns out good, with rich sauce, melted cheese, and tender pasta that makes a lot of comforting food we all love, especially when served with fresh salad and warm garlic bread. I enjoy making it ahead of time because the leftovers taste even better the next day, and that is why this simple dish stays at the heart of our table, bringing everyone together with every bite.
What Makes This Recipe Stand Out From Other Pasta Bakes
What makes this Cheesy, Baked, Rigatoni, easy, make, good, family, favorite, recipe, perfect, served, salad, garlic, bread, recipes, makes, lot, food, love, making, meal, Sunday, leftovers, night truly special is not just the rich cheese or the golden top, but the way it brings everyone together at the table. I have tried many pasta recipes, but this one always feels perfect because it is simple to make, tastes so good, and makes a lot of food without extra stress. The Cheesy layers melt into the Rigatoni, creating a Baked dish that feels warm and filling, especially when served with fresh salad and warm garlic bread. In my experience, it turns an ordinary Sunday into a comforting meal that the whole family will love, and it quickly becomes a true favorite. I also enjoy making it ahead for a busy night, knowing the leftovers will taste just as delicious the next day.
Ingredients You’ll Need for a Perfect Rigatoni Bake
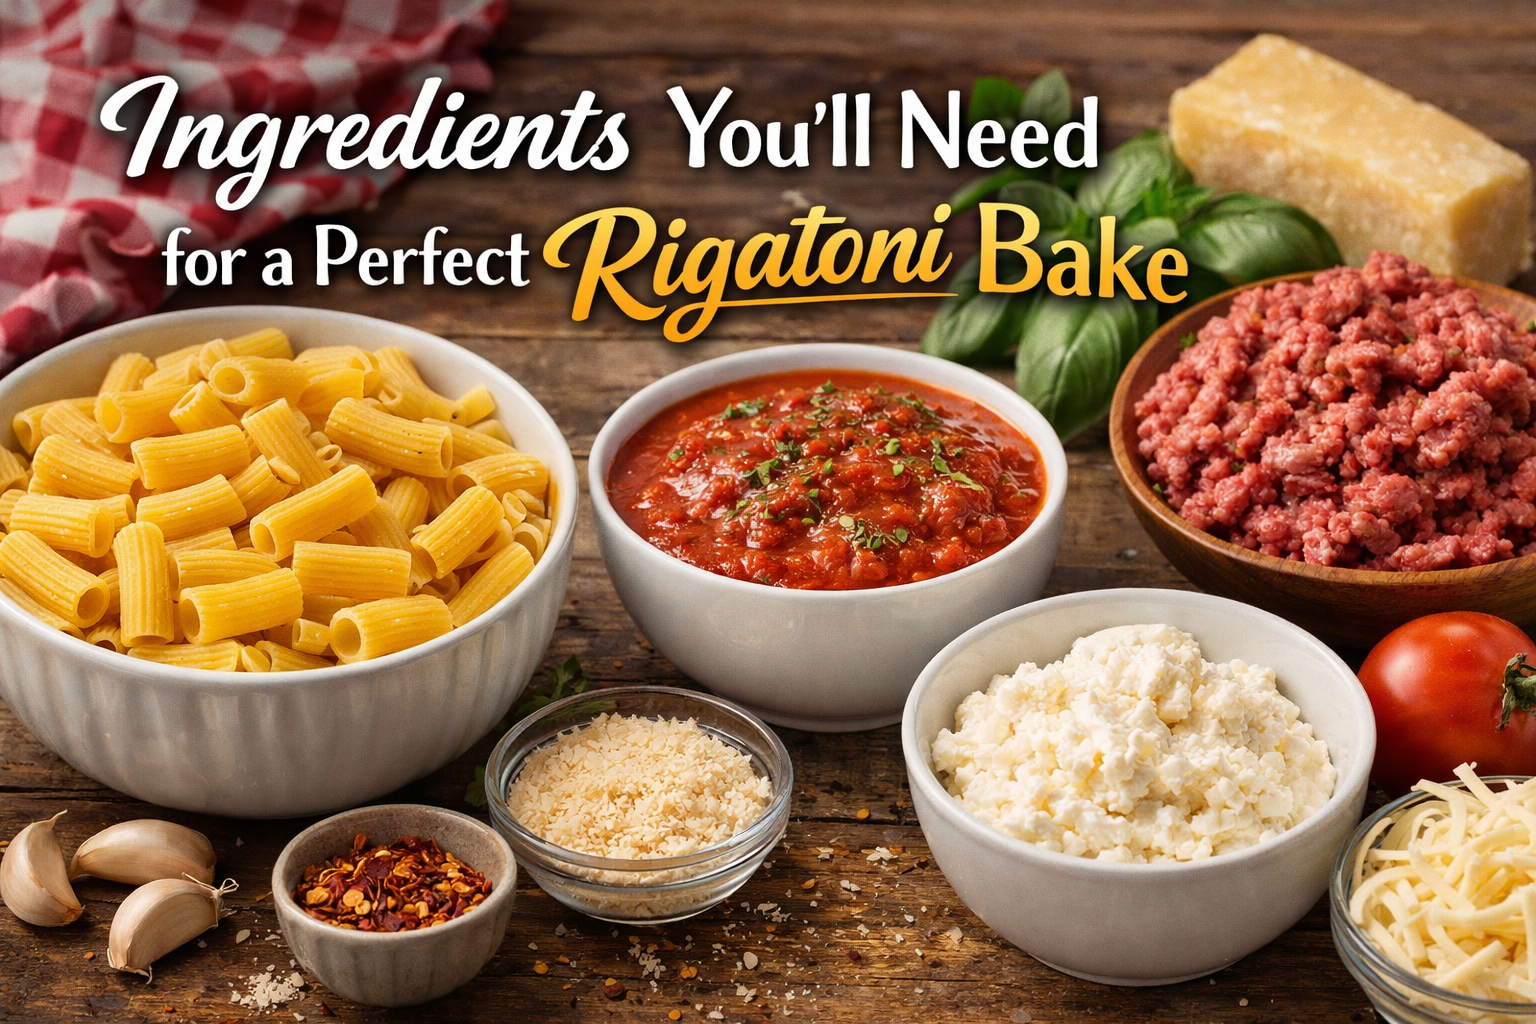
When I make a comforting rigatoni bake for my family, I always start with 16 oz rigatoni pasta because its shape holds sauce perfectly and gives every bite a rich taste. For the base, I cook 1 lb ground beef with 1 chopped onion, then season it well with 1/2 tsp each salt and pepper, 1 tsp each garlic powder, paprika, Italian seasoning, and 1/4 tsp red pepper flakes to build deep flavor without making it too spicy. I also add 1 tbsp minced garlic for a fresh and bold aroma. The sauce becomes hearty with 2 (24 oz) jars marinara mixed gently with 1/2 cup heavy cream to create a smooth texture. For the creamy layers, I spread 1 1/2 cups ricotta cheese and top everything with 8 oz shredded mozzarella cheese, a sprinkle of Parmesan cheese, and a little Dried parsley for color and freshness. Over the years, I’ve learned that using the right balance of these ingredients makes the bake rich, cheesy, and full of comforting Italian flavor from the first bite to the last.
Choosing the Right Pasta Shape and Cheese Combination
When I make a hearty rigatoni bake, I always begin with 16 oz rigatoni pasta because its ridges hold sauce in every bite, which truly makes a difference. After boiling the pasta just until al dente, I cook 1 lb ground beef with 1 chopped onion, then season it with 1/2 tsp each salt and pepper, 1 tsp each garlic powder, paprika, Italian seasoning, and 1/4 tsp red pepper flakes for gentle heat. I also add 1 tbsp minced garlic to deepen the flavor before pouring in 2 (24 oz) jars marinara and a splash of 1/2 cup heavy cream to create a rich, smooth sauce. The real magic comes from layering the pasta with 1 1/2 cups ricotta cheese for creaminess, 8 oz shredded mozzarella cheese for that perfect melt, and a generous sprinkle of Parmesan cheese for sharpness. I finish with Dried parsley on top, which adds color and a fresh touch, and from my experience, balancing these cheeses with the sturdy pasta shape ensures every forkful is creamy, saucy, and perfectly baked.
Step-by-Step Method for a Foolproof Baked Rigatoni
Before anything else, preheat the oven to 375 degrees F and get a big pot of water on high heat so it can boil while you work. I always follow the directions on the package when cooking 16 oz of pasta, whether it’s Rigatoni, penne, or ziti, because timing matters for the perfect recipe. While the pasta cooks, place a large skillet on medium-high heat and add 1 lb of ground beef with chopped onion, salt, pepper, garlic powder, paprika, Italian seasoning, and a pinch of red pepper flakes for a gentle kick. Once the meat is fully cooked, carefully drain the extra grease, then add 1 tbsp of minced garlic and stir until fragrant. Pour in 2 jars of marinara sauce—I often use my favorite brand of pasta sauce from Aldi—along with 1/2 cup of heavy cream to make the sauce rich and smooth, then turn off heat. Finally, mix in the boiled pasta you had set aside, making sure every piece is coated before baking, a small habit I’ve learned over time that keeps every bite full of flavor.
How to Cook Rigatoni to the Ideal Texture
I always start by placing a large pot of water over high heat and letting it boil before adding 16 oz of pasta, because following the directions on the package for Rigatoni, penne, or ziti makes a big difference in this recipe. Add a good pinch of salt, then cook until just firm to the bite, since the oven will finish the job; this is my simple trick after years of testing baked dishes. While the pasta cooks, preheat the oven to 375 degrees F so everything is ready on time. In a large skillet over medium-high heat, cook 1 lb of ground beef with chopped onion, seasoning with salt, pepper, garlic powder, paprika, Italian seasoning, and a pinch of red pepper flakes. Once the meat is fully cooked, drain the extra grease, then add 1 tbsp of minced garlic and stir until fragrant. Pour in 2 jars of marinara sauce, add 1/2 cup of heavy cream, and use your favorite brand of pasta sauce—I sometimes grab one from Aldi for convenience. Let the sauce simmer briefly, then turn off heat. When the pasta is ready, drain it well, combine the boiled pasta with the sauce mixture, and set aside until you are ready to assemble and bake.
Building Layers for Maximum Flavor
In my kitchen, great baked Rigatoni starts before the pan even goes into the oven, and it always begins when I preheat to 375 degrees F and bring a big pot of water to a rolling boil over high heat. I follow the directions on the package for 16 oz of pasta, whether I use Rigatoni, penne, or ziti, because structure matters in this recipe. While the pasta cooks, I heat a large skillet over medium-high heat and brown 1 lb of ground beef with chopped onion, salt, pepper, garlic powder, paprika, Italian seasoning, and a pinch of red pepper flakes until it is fully cooked. I always drain the extra grease to keep the layers clean, then add 1 tbsp of minced garlic and stir for extra depth. Next, I pour in 2 jars of marinara sauce—my favorite brand of pasta sauce, sometimes from Aldi—and a splash of heavy cream, about 1/2 cup, to balance the sauce, then turn off heat. After I drain the boiled pasta and set aside, I gently mix it with the meat sauce so every tube holds flavor, creating rich layers that bake evenly and taste better with every bite.
How to Assemble the Dish Like a Pro
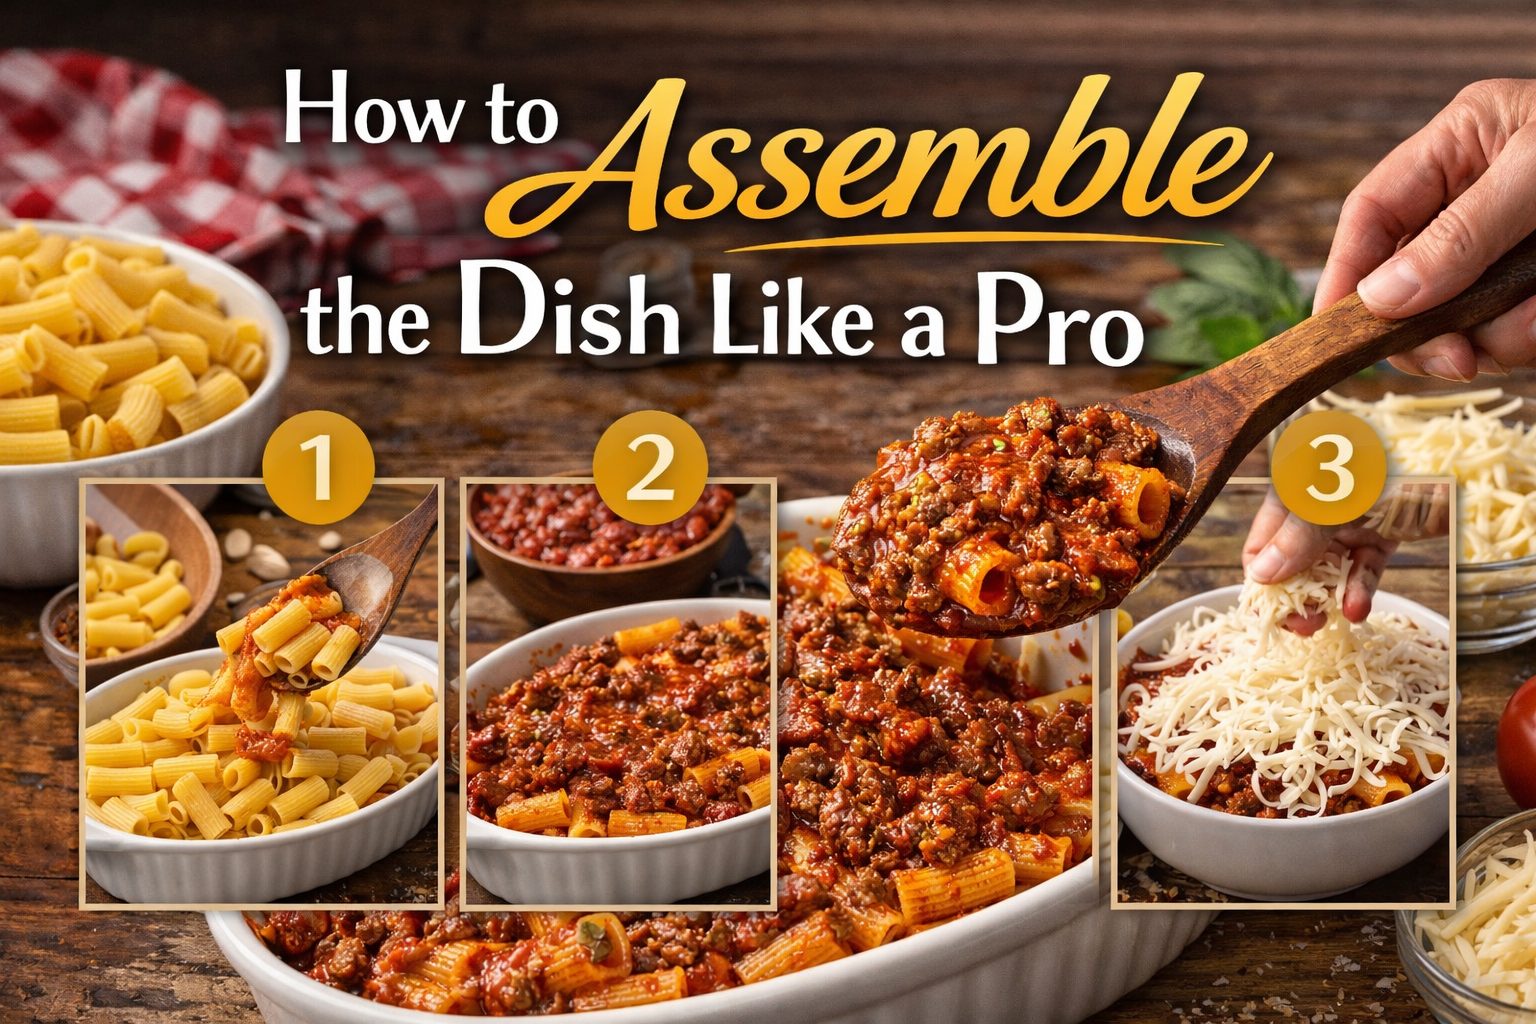
To assemble a perfect dish, I always start by setting up a greased, deep, 9×13, baking dish on the counter. This simple step makes the whole process smooth. Place your half, cooked, pasta evenly at the bottom. Then add the warm meat/sauce mixture and gently stir it so the sauce spreads through the large pan. I like using a large spoon to drop 1 1/2 cups of ricotta cheese across the surface. Instead of spreading it flat, try dropping small portions so it spreads nicely while it bakes in the oven. Add a thick layer of shredded mozzarella on top, then finish with the rest of the sauce. Cover it and bake at 375 degrees F for 25 minutes. After that, leave it uncovered and broil for the last minute until the top is browned. Keep an eye on it so it does not burn. Over the years, I learned that patience and simple layering help you truly build flavor in every bite.
Layering Sauce, Pasta, and Cheese Correctly
When I assemble a dish, I always start by pouring a thin coat of sauce into a greased, deep, 9×13, baking dish to help the pasta cook evenly and not stick. Then I add half of the cooked pasta, followed by the warm meat/sauce mixture. I gently stir it with a large spoon so everything is covered in rich sauce. Next, I drop 1 1/2 cups ricotta cheese across the layer, spacing each scoop so it spreads nicely as it bakes in the oven. I keep dropping small portions until the surface is balanced, then sprinkle shredded mozzarella on top. Repeat the rest of the layers to build height and flavor. I always bake at 375 degrees F for 25 minutes, first uncovered so the cheese melts well. For the last minute, I switch to broil until the top is browned, but I keep a close eye to prevent a burn.
Baking Tips for a Golden, Bubbly Finish
Baking is not just about heat; it is about timing, patience, and knowing your oven well. I always start by preheating my oven to 375 degrees F, because steady heat makes all the difference when you want a perfect golden brown crust and rich bubbling edges. When I bake a dish uncovered for 25 minutes, I watch how the cheese slowly melts, rises to the top, and turns beautifully golden brown. A light sprinkle of Parmesan cheese adds depth, while dried parsley gives color and balance. From my experience, keeping the dish uncovered during baking allows the surface to crisp while the inside stays soft and flavorful. The moment you see that steady bubbling and smell the toasted cheese, you know it is almost time to eat and truly enjoy the results.
Oven Temperature, Timing, and Resting Advice
When it comes to baking, I always start by setting the oven to 375 degrees F, because steady heat is the secret to a perfect bake. Place your dish on the center rack and cook it uncovered so the cheese on the top can turn golden brown and start bubbling evenly. In my experience, 25 minutes is often just right, but I still watch closely during the last few minutes to avoid overcooking. A light sprinkle of Parmesan cheese and dried parsley before baking adds flavor and helps create that crisp finish. Once done, let it rest for a few minutes after removing it from the oven; this short pause allows the layers to settle and makes it easier to serve. Then it’s finally time to eat, slice, serve, and enjoy the rich texture and perfect color.
Cheesy Variations Everyone Loves
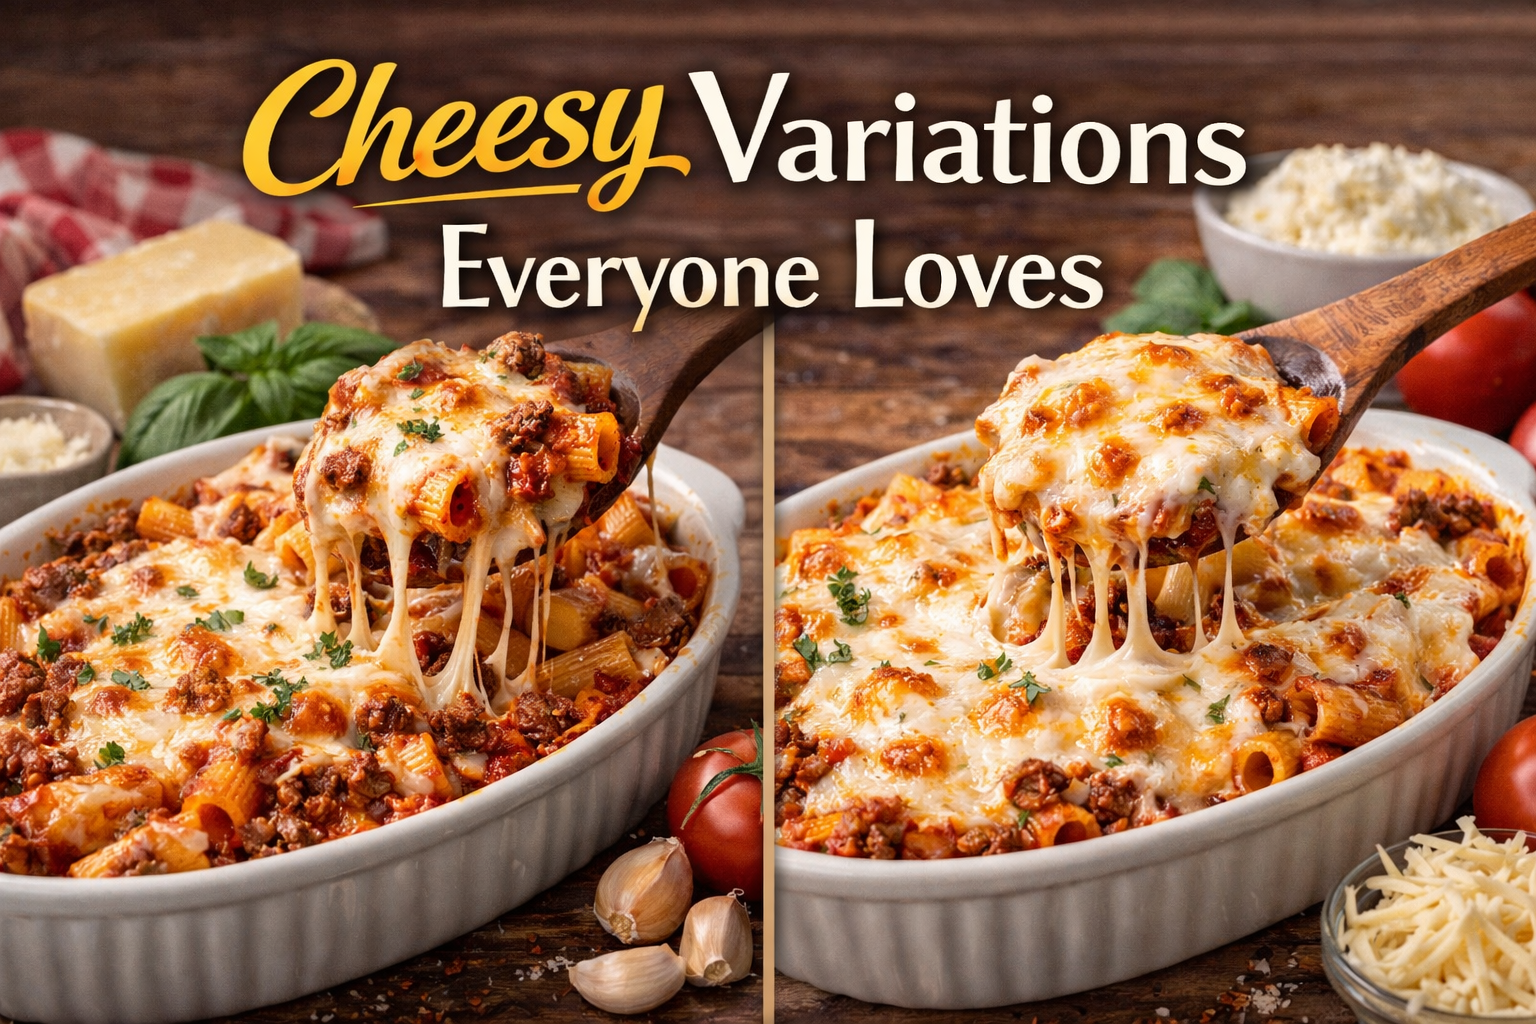
When I think about mozzarella and cheese, I remember standing in my kitchen, holding a block of fresh mozzarella, ready for shredding. There is something special about choosing between shredded and grated forms, because each one changes the texture and consistency of a dish. I often shred my own dairy favorite instead of buying pre-shredded packs, since a freshly grated or hand-cut piece melts in a more smooth, creamy way. The result feels creamier, with a more rich flavor that spreads evenly over pasta or pizza. Over the years, I have learned that the right cut and handling of mozzarella can turn a simple meal into something memorable, just by improving its melt, stretch, and overall texture.
Classic Cheese-Forward Version
When I want a dish that truly celebrates cheese, I always start with a good block instead of pre-shredded packs, because freshly shred or grated cheese melts better and gives a more smooth, creamy finish. In my kitchen, careful shredding of mozzarella, especially fresh mozzarella, creates a more creamier bite and a soft texture that feels naturally rich without being heavy. The secret is balancing the dairy elements so the consistency stays even from the first scoop to the last, allowing the melted layers to stretch beautifully while keeping that comforting, homemade taste.
Creamy and Comforting Cheese Blend Options
When I think about comfort food, I always start with mozzarella because its mild flavor and creamy melt make any cheese blend feel special. I often buy a block instead of pre-shredded packs, since shredding it at home gives a creamier melt and a better texture. The way you shred or use grated pieces can change the consistency, making sauces more smooth and rich. I have found that mixing fresh mozzarella with other dairy choices creates a deeper flavor while keeping that soft, stretchy finish everyone loves. Whether you sprinkle shredded cheese over pasta or melt a block into a sauce, the key is balancing flavor and melt so the final dish feels warm, comforting, and full of rich, creamy goodness.
Rich and Creamy Cheese-Based Bakes
When I think about comfort food, I always start with cheese-based bakes because they bring a rich and creamy taste that feels both simple and special. In my own cooking and baking, I have learned that the secret to perfect creaminess and deep richness often comes from using fresh dairy, smooth heavy cream, and the right balance of ingredients in the recipe. A well-made sauce blended with melted cheese creates a soft texture and bold flavor that turns any dish into something truly delicious. What makes these dishes stand out is not just the cheese, but how carefully the ingredients are layered and baked to hold moisture, boost flavor, and keep the inside creamy while the top turns golden. Over the years, I have found that patience during baking helps the sauce settle, the heavy cream thicken, and the cheese-based layers form the perfect texture that defines great rich and creamy bakes.
A Traditional Cheese-Only Pasta Bake
When I think about cheese-based bakes, I always return to A Traditional Cheese-Only Pasta Bake, because this simple recipe shows how rich and creamy a dish can be without adding meat or extras. I start my cooking by warming heavy cream into a smooth sauce, then fold in good dairy like aged cheddar and mozzarella to build deep flavor, natural creaminess, and real richness. During baking, the top turns golden while the inside stays soft, giving a perfect texture that feels both light and full at the same time. With just a few quality ingredients, this method proves that simple can still be incredibly delicious, and from my own kitchen experience, controlling the heat and stirring the cream slowly makes all the difference in how smooth and balanced the final dish tastes.
Extra Creamy Oven-Baked Cheese Version
When I make an Extra Creamy Oven-Baked Cheese Version, I focus on balance, because truly great cheese-based bakes are not just about more dairy, but about how each of the right ingredients works together to build richness, deep flavor, and a smooth texture. In my own cooking and baking, I always start with fresh cheese, then add heavy cream to create a silky sauce that turns perfectly creamy in the oven; this simple step changes the whole recipe and gives that extra layer of creaminess people remember. The slow heat allows the top to turn golden while the inside stays soft, rich, and full of bold flavor, making every bite feel truly delicious without being too heavy. I have learned that patience matters most, because careful timing helps the natural dairy notes shine, keeps the texture smooth, and ensures the final dish delivers the right level of richness that defines unforgettable cheese-based bakes.
Ricotta-Based Baked Rigatoni Variations
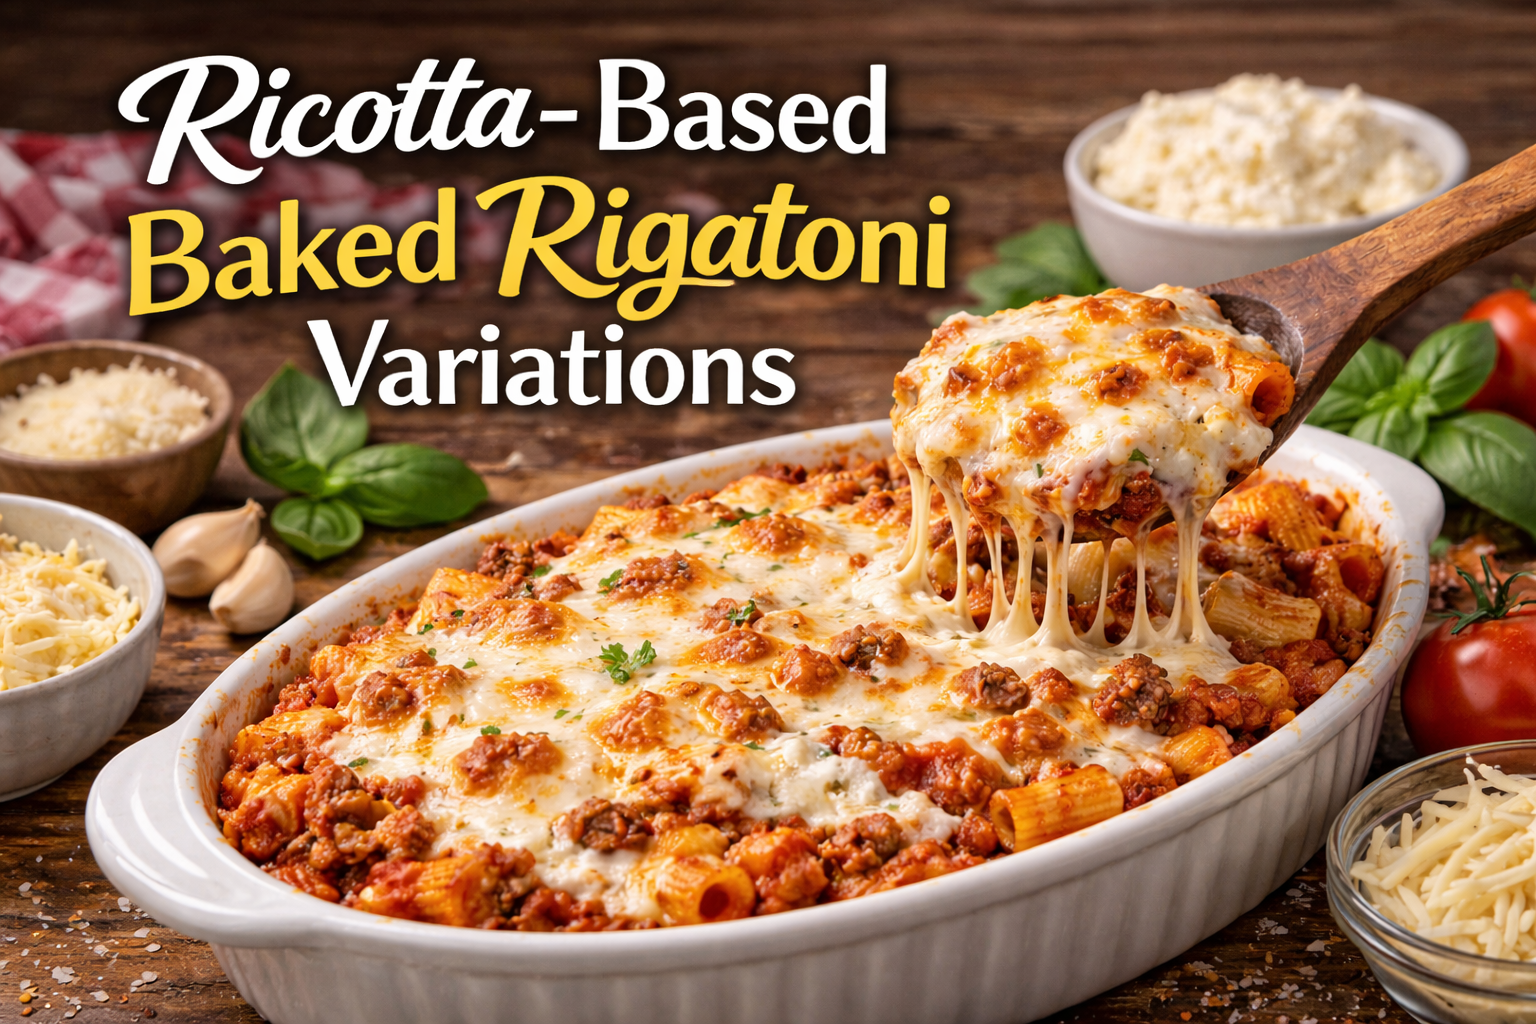
Rigatoni is always my first choice when I plan a warm and comforting ricotta-based baked pasta dish, especially when I follow a classic recipe that uses 16 oz as the standard measurement in ounces for perfect balance. Over the years, I have tested many variations, sometimes using penne or ziti as a simple substitute or alternative, but I find that Rigatoni holds the creamy filling better than any other pasta. The key is choosing fresh ingredients, mixing smooth ricotta with care, and baking until the top turns golden and slightly crisp. In my kitchen, I always measure carefully in ounces, because even a small change in measurement can affect texture and flavor. Whether you stay traditional or try new variations, this ricotta-based baked dish shows how one simple recipe can turn basic ingredients into something rich, hearty, and deeply satisfying.
Balancing Ricotta and Mozzarella for Texture
When I make Ricotta-Based Baked Rigatoni Variations, I always start by thinking about texture, especially in this recipe where the balance of cheese defines the dish. For a classic tray of Rigatoni using 16 oz of pasta, I mix creamy ricotta with shredded mozzarella in careful measurement, usually counting in ounces to keep the ratio right, so the dish turns out rich but not heavy. Too much ricotta can make it dense, while extra mozzarella gives that stretchy top layer we all love in a baked dish. If I want a small twist, I sometimes substitute half the Rigatoni with penne or even ziti as an alternative, and these simple variations still hold the sauce well. Choosing fresh ingredients also matters, because good ricotta blends smoothly and helps the ricotta-based filling stay soft inside while the top turns golden and slightly crisp in the oven.
Hearty Meat Lover’s Rigatoni Bakes
rigatoni with ground beef is where I always begin when I want a meal that feels warm, filling, and made for true comfort. Over the years, I have learned that a good beef rigatoni bake is not only about pasta and meat, but about balance, texture, and timing. I prefer making baked rigatoni with beef slowly, letting the sauce thicken and the cheese melt into every tube of pasta. The rich flavor of the beef blends deeply with the sauce, while the rigatoni holds everything inside, giving each bite a bold and hearty taste. From my own kitchen experience, I have found that using fresh herbs and cooking the ground beef just right makes the dish stronger in flavor and more satisfying. This meal is perfect for family dinners, weekend gatherings, or even meal prep, because it stays delicious, warm, and comforting every time it comes out of the oven.
Classic Beef-Filled Family Casserole
When I think of comfort food that truly brings everyone to the table, I start with baked rigatoni with beef, because this Classic Beef-Filled Family Casserole turns simple pantry ingredients into a rich, filling meal that feels both hearty and homemade. I often prepare a beef rigatoni bake on busy weekends, layering tender pasta with seasoned meat and a smooth tomato sauce, then topping it with cheese that melts into every corner; the result is pure comfort in every bite. The beauty of rigatoni with ground beef is how the pasta tubes hold the savory juices, making each forkful balanced and satisfying without being heavy. Over the years, I have learned that slow-simmering the beef with garlic and herbs before baking makes the flavor deeper and more memorable, giving this dish its true meat lover’s character while still keeping it simple enough for any family dinner.
Using Ground Beef for Deep, Savory Flavor
When I make baked rigatoni with beef, I always start with well-seasoned rigatoni with ground beef because this is where the deep, savory taste truly begins. I cook the beef slowly until it turns rich and slightly crispy on the edges, which builds strong flavor without needing too many extra ingredients. Over the years, I have learned that choosing good quality ground beef with a little fat makes the sauce thicker and more comforting. As it simmers with tomatoes, garlic, and herbs, the meat soaks up every flavor and holds it inside each bite of pasta. When layered with cheese and baked, the beef rigatoni bake becomes hearty, filling, and perfect for family dinners. The pasta tubes trap the sauce and meat, so every forkful tastes balanced, warm, and deeply satisfying
Casserole-Style Rigatoni for Feeding a Crowd
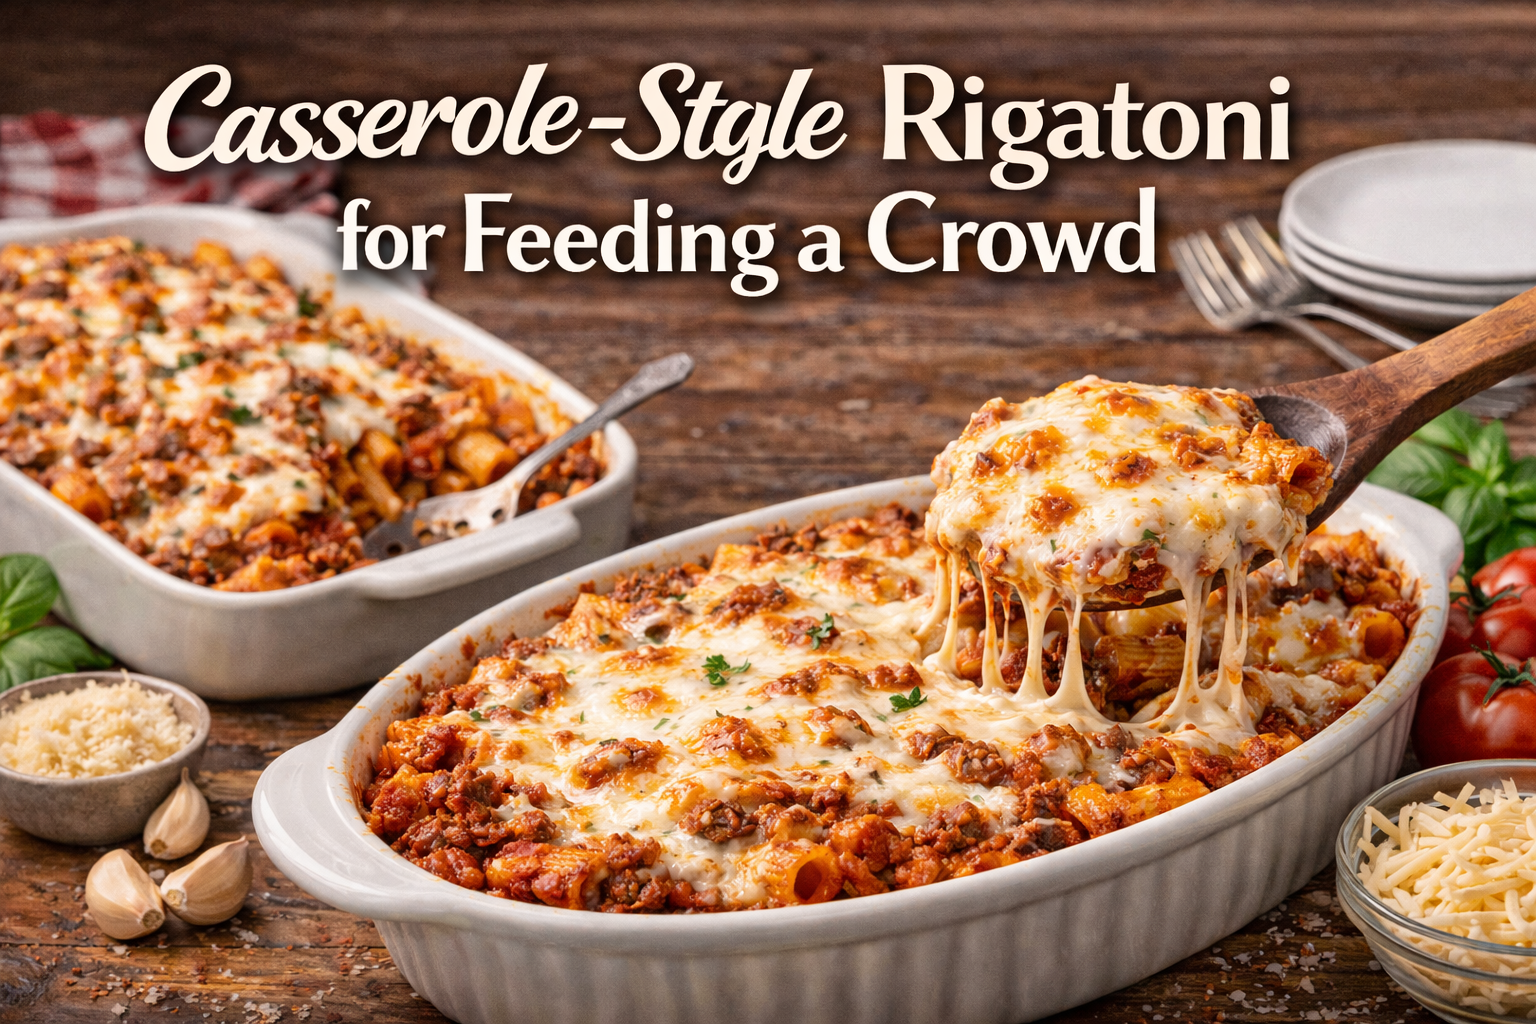
When I need a warm and filling dish for family gatherings, I always turn to rigatoni baked in a hearty casserole because this simple recipe is easy to scale and never fails to satisfy a crowd. The wide tubes of rigatoni hold rich sauce and melted cheese, which makes every bite of this baked casserole comforting and flavorful. I have made this recipe for birthdays, potlucks, and church dinners, and each time the pan comes back empty. A good casserole like this saves time, reduces stress, and allows you to prepare the rigatoni ahead of time, so you can focus on your guests. With the right balance of sauce, seasoning, and perfectly cooked rigatoni, this crowd-friendly recipe turns a simple pasta dish into a reliable casserole centerpiece that feels both homemade and special.
A Comforting Make-Ahead Dinner Option
When I need a dish that is warm, filling, and easy to share, I turn to a rigatoni casserole recipe that I can prepare ahead of time without stress. I have made this meal for family gatherings and community dinners, and it never fails to satisfy a hungry crowd. The beauty of baked rigatoni is how well it holds sauce and cheese, making every bite rich and balanced. You can assemble the casserole in the morning, cover it, and place it in the fridge until you are ready to bake. This simple recipe saves time and keeps your kitchen calm when guests arrive. I like to use fresh herbs and a hearty tomato sauce to give the rigatoni deep flavor, while the baked casserole texture creates a golden top that everyone loves. It is the kind of recipe that feels comforting, practical, and perfect for feeding a crowd without extra effort.
More Ways to Cook With Rigatoni Pasta
When I think about new ways to use rigatoni, I often start with dishes like Homemade Lasagna and then change the shape but keep the same rich flavors. Rigatoni holds sauce inside its tubes, which makes it perfect for baked meals that feel just as hearty as Cheesy Stuffed Shells. On busy nights, I turn it into a quick pan dish inspired by a Lazy Lasagna Skillet Meal, layering sauce, cheese, and pasta in one pot. I have even paired rigatoni with crispy Easy Chicken Cutlets for extra texture, or mixed it with creamy sauces like those in Easy Alfredo Chicken Tortellini to create a smooth and filling dinner. When I want comfort food, I borrow ideas from Crockpot Chicken and Gnocchi and Creamy Chicken and Noodles, using slow-cooked flavors and tender chicken with rigatoni instead. Over the years, I have learned that this pasta shape is more flexible than people think, and with the right sauce and simple ingredients, it can bring fresh life to many classic family meals.
Saucy Stove-Top Favorites
When I think about comfort food, I often remember how Homemade Lasagna and Cheesy Stuffed Shells filled my kitchen with rich aroma, but on busy nights I turn to rigatoni to create the same cozy feeling in less time. Inspired by a Lazy Lasagna Skillet Meal, I simmer rigatoni right on the stove with tomato sauce, herbs, and melted cheese so every tube holds bold flavor without layering or baking. For a heartier twist, I slice Easy Chicken Cutlets and fold them into the pasta, or stir it into a creamy sauce similar to Easy Alfredo Chicken Tortellini for a silky finish. When I want something extra comforting, I borrow ideas from Crockpot Chicken and Gnocchi and Creamy Chicken and Noodles, using broth, cream, and tender chicken to coat the rigatoni in a thick, satisfying sauce. This stove-top method keeps things simple, saves time, and still delivers the rich taste I love from classic pasta dishes.
Serving Suggestions and Storage Tips
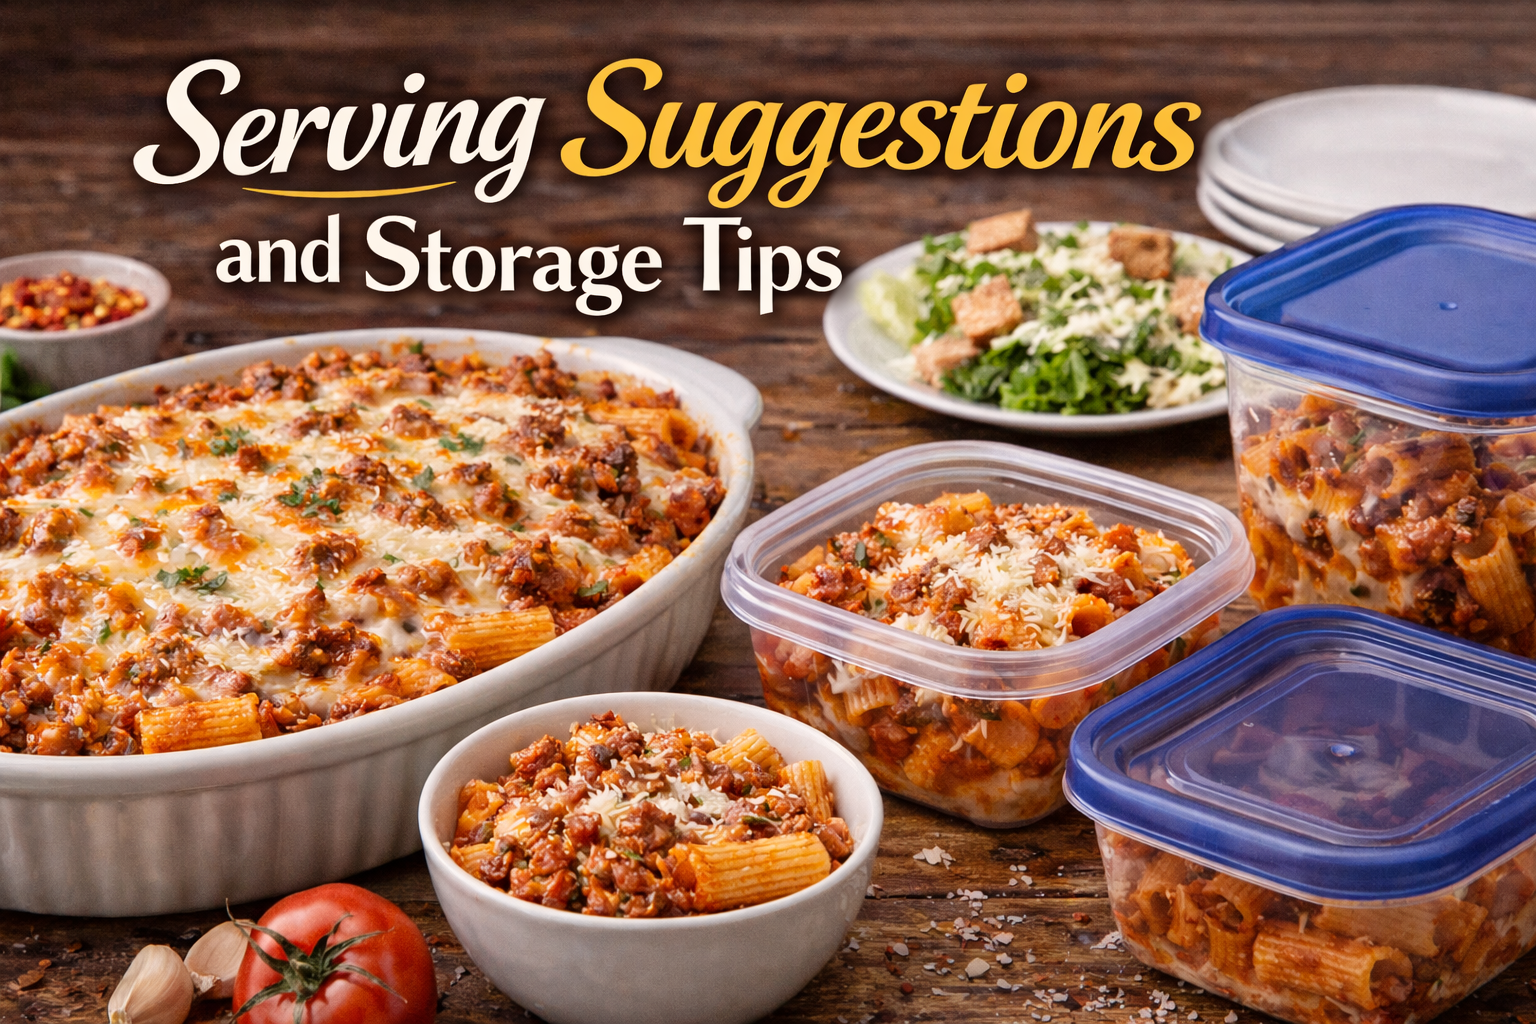
When it’s time to eat, I always bring the Cheesy Baked Rigatoni straight from the oven to the table, while the cheese is still bubbling and the top is perfectly golden brown. I like to finish it with a sprinkle of dried parsley and extra Parmesan cheese for a fresh and rich flavor. This dish is best served hot as a complete meal, paired with a crisp Caesar salad and warm garlic toast on the side. From my experience, letting it rest for a few minutes before serving helps the layers set, making each bite easier to scoop and more satisfying to enjoy. For storage, allow the pasta to cool fully, then cover it tightly and refrigerate; when reheating, add a small splash of water, cover with foil, and warm until the cheese melts again and turns lightly bubbling on top, bringing back that fresh-from-the-oven taste.
How to Store, Reheat, and Freeze Successfully
When it’s time to eat, I always like to serve Cheesy Baked Rigatoni fresh from the oven while the cheese on top is still golden brown and bubbling, then finish it with a light sprinkle of dried parsley and extra Parmesan cheese for more flavor; this dish is best served hot as a comforting meal with crisp garlic toast and a fresh Caesar salad, which balances the richness perfectly. From my experience, if you have leftovers, let the pasta cool fully before storing it in an airtight container in the fridge for up to three days, and when reheating, cover it and warm it slowly in the oven so the cheese melts evenly again without drying out; for longer storage, freeze portions tightly wrapped, then thaw overnight in the fridge before reheating so you can still truly enjoy that same creamy texture and rich taste.
FAQs and Expert Tips for Perfect Rigatoni Every Time
When I make Lazy Lasagna Skillet Meal, I always start with Rigatoni because its shape holds every drop of sauce better than penne or ziti. For me, cooking 16 oz just feels right for a small family dinner.
I have tested this recipe many times with 1 lb ground beef or Italian sausage, and sometimes both for richer beef flavor. If someone in the family prefers lighter food, I simply leave out the sausage.
How long should rigatoni cook before baking?
For a quicker version of a baked Rigatoni recipe, boil 16 oz pasta in salted water for 1–2 minutes less than the package says, so it finishes in the oven without turning soft. I always test one piece; it should feel firm but not hard, especially when mixing with a rich sauce made from ground beef or Italian sausage.
Is baked rigatoni the same as a pasta bake?
Many people ask if Rigatoni is just like penne or ziti in a pasta bake. In my kitchen, I find baked Rigatoni holds more sauce and gives a more creamy bite every time.
A good recipe often starts with 16 oz pasta and 1 lb ground beef or Italian sausage. I sometimes mix beef with sausage for deeper flavor my family always prefers.
What’s the best cheese combination for rigatoni and cheese?
For my best Rigatoni recipe, I use a block of mozzarella cheese and shred it fresh for a creamier consistency. Add 1/2 cup heavy cream to the sauce to make it extra creamy and rich.
If my family prefers bold taste, I mix in cooked ground beef or Italian sausage (about 1 lb). This simple step makes it more delicious than basic penne or ziti bakes.
Can I make a cheesy rigatoni bake ahead of time?
Yes, you can prep Rigatoni with sauce, ground beef, or Italian sausage (about 1 lb beef) a day before and keep it covered for your family.
Before baking, add 1/2 cup heavy cream for a creamier consistency, then top with freshly shred mozzarella cheese from a block for a more creamy and delicious finish.
Why do people misspell rigatoni so often?
Many people confuse Rigatoni with penne or ziti because the pasta shapes look close at a glance.
As someone who tests every recipe twice, I see that small spelling errors happen just like small cooking mistakes.
The name feels simple, yet people rush and type it wrong.
When cooking for family, I learned that details matter, even in the name.